PilotRc Predator 2.2 sport jet Kingtech K130G4+

Hello guis,
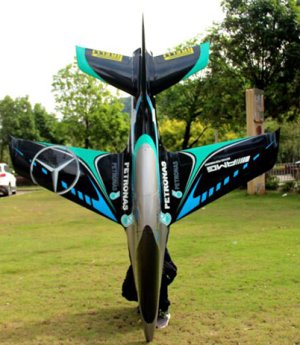
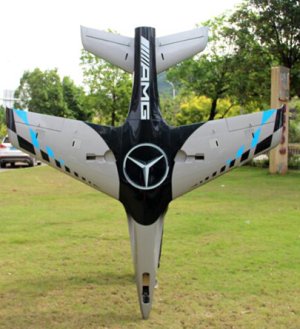
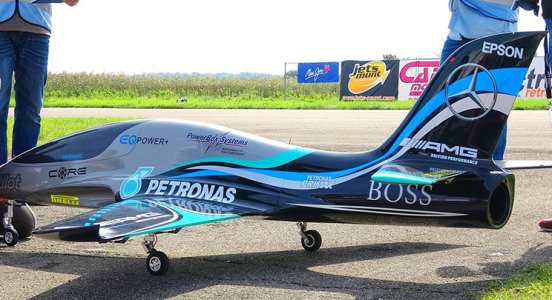
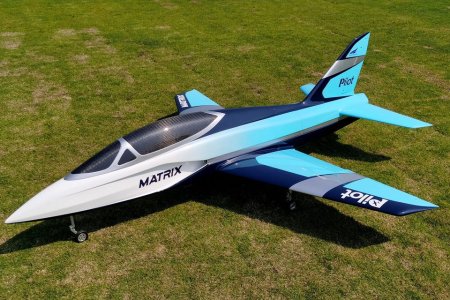
I don't know if it may be of interest to anyone but I want to share my first experience with a turbine jet made by the PilotRC company with those who are interested. I have already bought several models from Pilot but to date only with 4-stroke engine and 2-stroke propeller. This "Predator" sport jet had already impressed me for some time but for economic reasons I had put it off. Now I've decided to buy it thanks to a tempting offer from Mattfly on the occasion of the last Black Friday. I was aware of the imminent release of the new PilotRc “Matrix” but I liked the Predator better… What do you say, could a mini review be of interest? Let me know!
 

Anhänge

  • Vista sopra.jpg
    Vista sopra.jpg
    112,5 KB · Aufrufe: 106
  • Vista sotto.jpg
    Vista sotto.jpg
    97,5 KB · Aufrufe: 104
  • Predator a terra.jpg
    Predator a terra.jpg
    185,7 KB · Aufrufe: 105
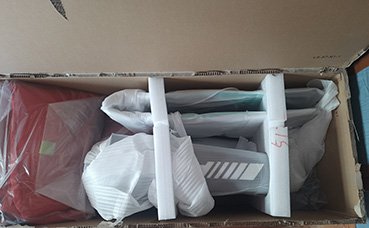
  • Scatolone.jpg
    Scatolone.jpg
    47,3 KB · Aufrufe: 102
  • Ali.jpg
    Ali.jpg
    43,9 KB · Aufrufe: 93
  • Piani quota.jpg
    Piani quota.jpg
    47,2 KB · Aufrufe: 104
  • Matrix.jpg
    Matrix.jpg
    176,2 KB · Aufrufe: 116
Ok. Go on...
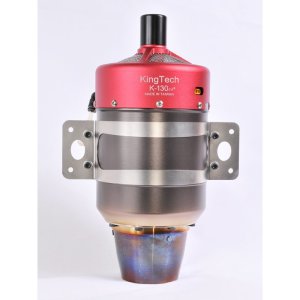
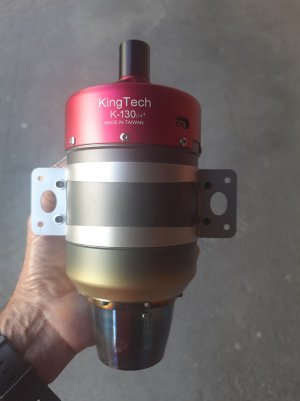
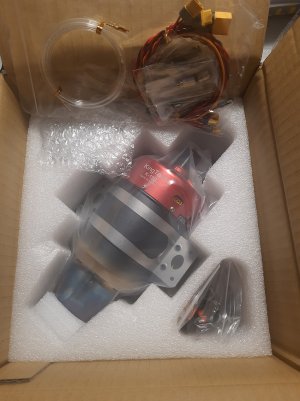
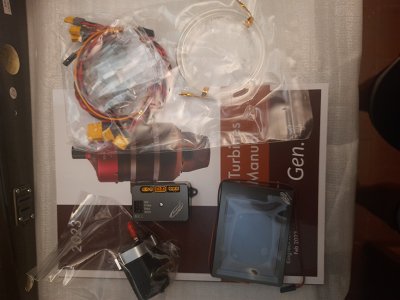
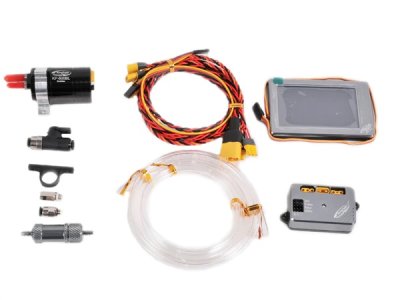
The occasion was also good to test the G4+ generation of Kingtech turbines which was waiting for a jet to host it: the K130G4+. A compromise between power and lightness and which should be perfect for this jet which in flight order (with kerosene) should be around 13/14kg. Kingtech 130 turbine has a diameter: 94.5mm, length: 220 mm and weight of 1270 grams and maximum thrust at 142,000 rpm. It has food as standard and requires 9.9v or 3S Li-Fe batteries. Specific accessory parts supplied include the KP-500BL brushless fuel pump developed and manufactured by King Tech complete with bracket, this pump is one of the major differences between the G4 and G4+ turbines, as older G4 turbines use fuel pumps with brushes. As with all of the new G4+ range, a DRM (Data Relay Module) has replaced the ECU, as the turbines themselves now incorporate much of what was previously included in the ECU such as all operating parameters including total run time etc.
 

Anhänge

  • kingtech-k130g4.jpg
    kingtech-k130g4.jpg
    67,4 KB · Aufrufe: 47
  • Turbina in mano.jpg
    Turbina in mano.jpg
    159,9 KB · Aufrufe: 45
  • 20230811_160649.jpg
    20230811_160649.jpg
    324,3 KB · Aufrufe: 48
  • 20230811_160751.jpg
    20230811_160751.jpg
    178,1 KB · Aufrufe: 52
  • Accessori turbina.jpg
    Accessori turbina.jpg
    50,4 KB · Aufrufe: 49
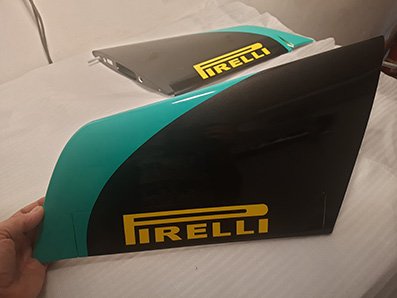
But let's get back to the Predator. The Jet arrives in a huge, ultra-strong, protected cardboard box. Fuselage divided in two to facilitate transport, wings with new locking system with Allen bolt drowned in the trailing edge in the attachment rib, same system for the altitude planes: excellent and fast. Good paintwork and friezes and adhesive writings applied before the transparent (passing the hand you can feel the slight step). Complete the electric trolley kit with brakes, exhaust pipe, fiber tank and Uat.
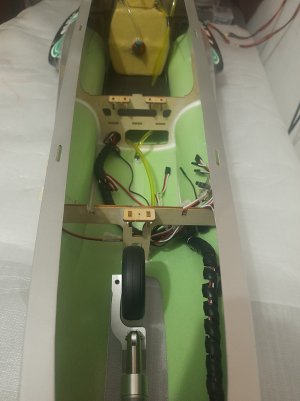
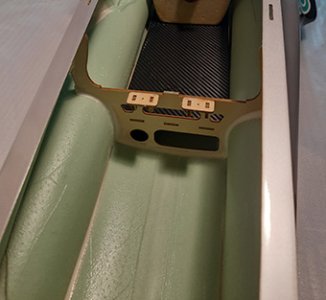
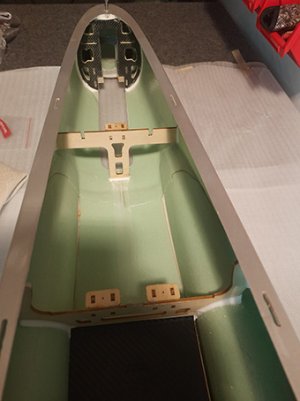
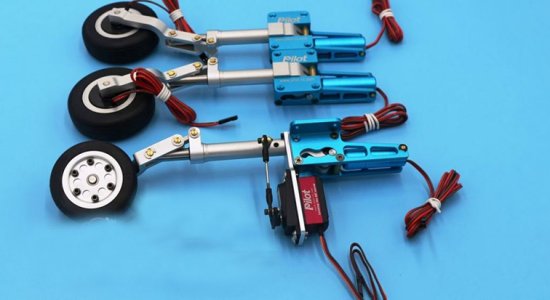
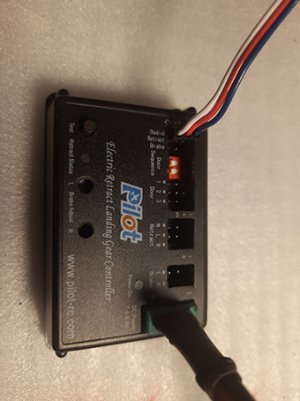
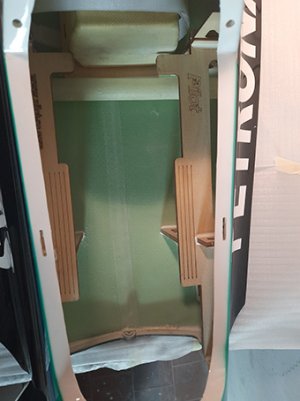
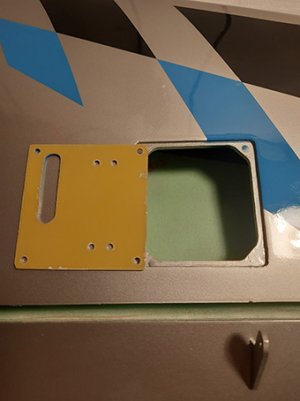
Assembly without particular problems thanks to the two large openings both in the turbine compartment and in the one for the electronics (on two levels). You need 7 standard 25/30kg servos plus a mini for front steering. Wide range of accessories such as adjustable tie rods, brackets, uniball, nuts, bolts, cable clamps, etc. The servos are fixed on the lids of the servo compartments with 4 generously sized self-tapping screws and the same thing for the trolleys (marked PilotRc but which I doubt are JP Hobby…) which are well made and robust. A little disappointing is the trolley control unit which appears to be "chinese" (it also has a small key to test the opening and closing without connecting the Rx but not used because it messes up the opening and closing coordination (I asked Pilot for guidance and I they said they are thinking about removing this feature…).
 

Anhänge

  • 20230705_153554.jpg
    20230705_153554.jpg
    288,9 KB · Aufrufe: 75
  • 20230801_182410.jpg
    20230801_182410.jpg
    197 KB · Aufrufe: 71
  • Sezione centrale fuso.jpg
    Sezione centrale fuso.jpg
    51,9 KB · Aufrufe: 61
  • Sezione frontale fuso.jpg
    Sezione frontale fuso.jpg
    63,4 KB · Aufrufe: 75
  • Carrelli.jpg
    Carrelli.jpg
    103,5 KB · Aufrufe: 74
  • centralina carrelli.jpg
    centralina carrelli.jpg
    68,7 KB · Aufrufe: 76
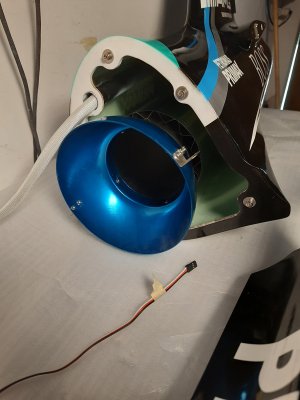
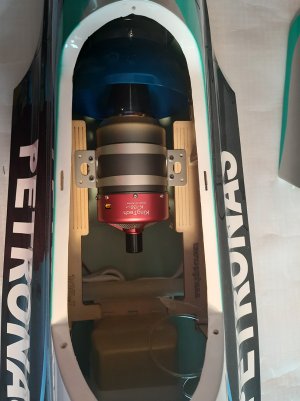
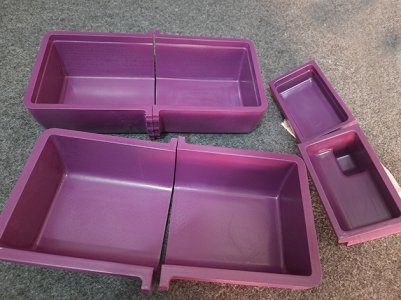
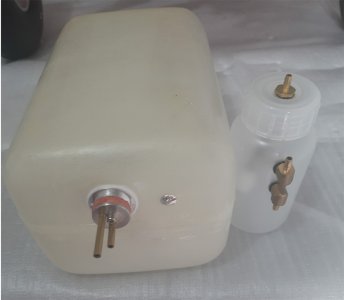
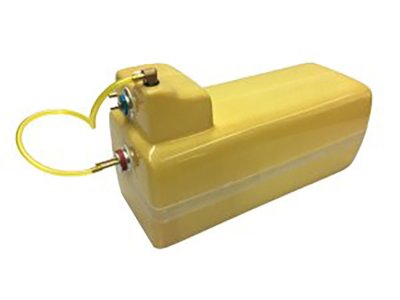
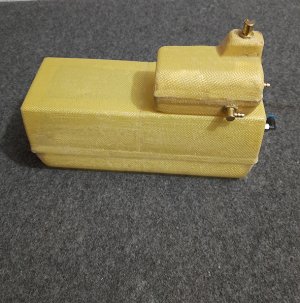
When assembling the two-piece fuselage, I recommend first inserting the double chamber exhaust pipe (included in the kit) into the tail section and then tightening the two parts (in this case you will find it a bit difficult to reach the bolts underneath and above the drain pipe). The same exhaust already has two "L" flanges inserted in the funnel and which are screwed into the base of the turbine. The Kingtech K130G4+ fits well to the base in the turbine compartment without the need for adjustments. The connections of the Kingtech turbine with the ECU are reduced to only the data cable and the fuel line. Solenoid valves and part of the electronics are inserted in the turbine itself. The el Predator 2.2 kit includes the fiber bin tank and the Uat but the kevlar tank is also available as an accessory. I dedicated myself to its “Home made” construction after having printed the negative mold in 3D (…!).
While for the arrangement of the turbine we are obliged to the position, for the tank we have more room to maneuver and it is important for the balance of the weights (like any Jet, this too will need weight at the tip...).
 

Anhänge

  • Turbina in sede.jpg
    Turbina in sede.jpg
    254,8 KB · Aufrufe: 90
  • vano anteriore fuso.jpg
    vano anteriore fuso.jpg
    67,8 KB · Aufrufe: 71
  • Pompa e ECU turbina.jpg
    Pompa e ECU turbina.jpg
    168,7 KB · Aufrufe: 85
  • Stampi verniciati copia.jpg
    Stampi verniciati copia.jpg
    267,4 KB · Aufrufe: 91
  • Serbatoi.jpg
    Serbatoi.jpg
    96,6 KB · Aufrufe: 88
  • Serbatoio originale.jpg
    Serbatoio originale.jpg
    52 KB · Aufrufe: 84
  • Serbatoio stampato completo2 copia.jpg
    Serbatoio stampato completo2 copia.jpg
    337,6 KB · Aufrufe: 86
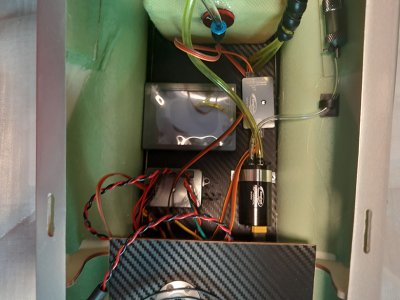
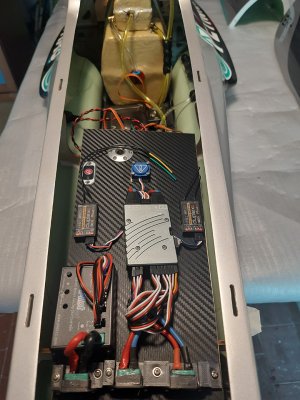
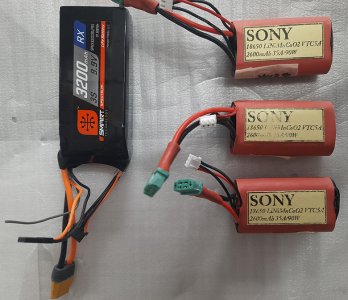
The Predator 2.2 PiloRc in the fuselage has two plywood bases covered in black PVC: a fixed one where the tank, the pump, the ECU, the filter and possibly the turbine battery are located, and a raised removable one where the servo control unit is located. that of the retractable landing gear, the receivers, ignition switch, gyro, refueling point (included in the kit) and the batteries for the landing gear and control unit. I moved all three 2S 2600Mah Li-Ion batteries (Sony 18650 VTC5A 2600mAh 35A/90W) as far forward as possible. And still with regard to batteries, it should be emphasized that Kingtech specifies that for its turbine it is necessary to use 3S LiFe batteries with a voltage of 9.9v. I specifically asked Kingtech if I could use the classic 2S lipo and they answered me “strictly LiFe 9.9v”…!
 

Anhänge

  • Basetrta elettronica.jpg
    Basetrta elettronica.jpg
    321 KB · Aufrufe: 56
  • Batterie.jpg
    Batterie.jpg
    229,2 KB · Aufrufe: 59
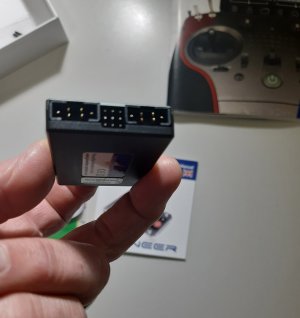
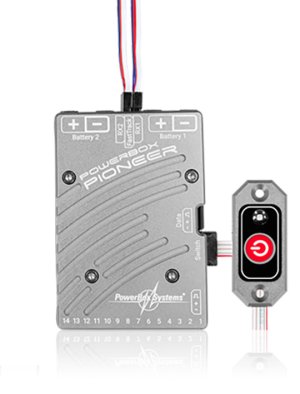
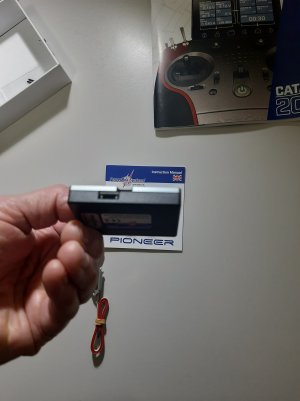
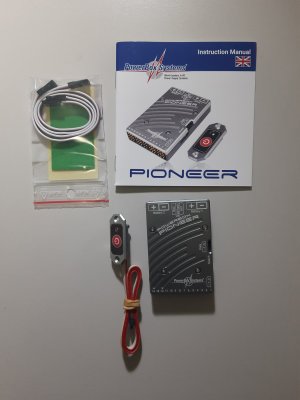
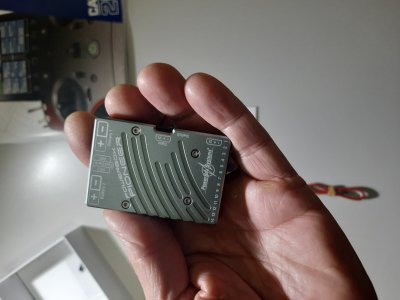
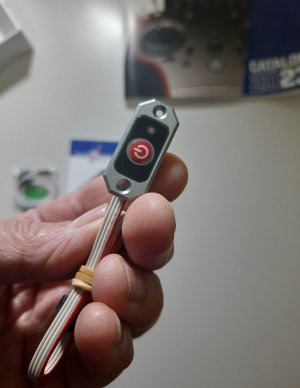
For the servos control power unit I chose a Pioneer Powerbox because I had already tried it on another model and it is, as well as cheap, light, small and easy to adjust. A "power unit" which can manage up to 14 channels and which (deliberately) does not provide for any regulation of the supply voltage because it was expressly designed for HV (high voltage) servos. So the output voltage will be exactly identical to the input voltage but stabilized and with power supply redundancy as it manages two 2S Lipo packs (or Lithium, Ni-Mh, Life-Po) with a 4-9 Volt range. The equipment is completed by a pressure or (optional) magnetic MicroMag switch. All servo outputs can handle currents of 10 amps. continuous and 20 amps. up to 30 seconds while inputs are provided for the two receivers.

The Pioneer Powerbox ((63x44x12mm for 44g of weight) has no display or visual signals on its case but all the information, programming, battery charge data, etc. are transmitted telemetrically to the transmitter (PowerBox, Futaba, Jeti and Spektrum selectable from the menu control unit configuration); obviously to do this you will need either the PowerBox USB interface or the “BlueCom” programmer which can be purchased separately.

But the surprises don't end there: a feature that makes the Pioneer unique in its category is its integrated iGyro technology that requires only the iGyro SAT (optional) as a motion sensor. Once connected, the sensor transforms the Powerbox into a powerful 9-axis gyro of the latest generation (3x aileron, 3x elevator, 3x rudder). Powerbox has tried to simplify the programming of this gyroscope as much as possible which can be configured in a few minutes (so to speak, you will have to lose some time...). All the setting characteristics present in all the gyroscopic devices of the PowerBox remain unchanged.
 

Anhänge

  • Connettori 2.jpg
    Connettori 2.jpg
    243,6 KB · Aufrufe: 51
  • Centraslina e interruttore.jpg
    Centraslina e interruttore.jpg
    67,6 KB · Aufrufe: 49
  • Connettori.jpg
    Connettori.jpg
    380,4 KB · Aufrufe: 50
  • Contenuto pack.jpg
    Contenuto pack.jpg
    249,9 KB · Aufrufe: 51
  • In mano.jpg
    In mano.jpg
    750,7 KB · Aufrufe: 51
  • Interruttore.jpg
    Interruttore.jpg
    213,7 KB · Aufrufe: 53
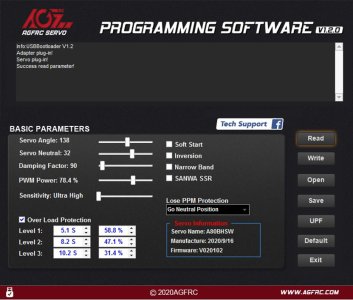
The assembly work continues with fixing servos in the appropriate wood bases that are screwed into the wings (same setup for the rudder), while for the upper planes the servos are blocked in a rib inside the semi-quote (with a little patience you can insert the servo...|). All the servos are standard HV 40kg thrust and I chose the AGFRc becouse I have read good reviews on many specialized websites and retailers, including Italian ones. They can be programmed in different functions (soft start, direction, working angle, failsafe, power, etc.) and with a optional USB interface that can be purchased separately and the dedicated software for now only Windows. The PilotRc kit also includes all the control rods and all the uniballs already made to measure (more or less...).

I not explain the assembly work for retract landing gear and brakes as it is now a routine job for both small EDF and turbine jets and is therefore well known.

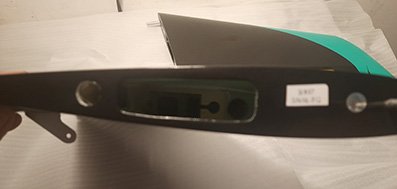
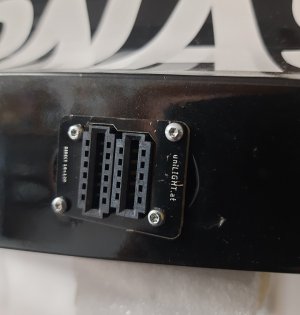
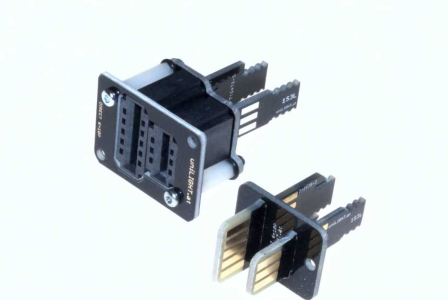
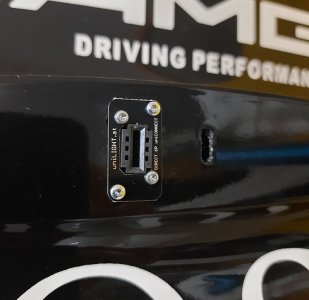
The wings/fuselage and quote/fuselage connection system is very interesting. I like to try the connectors from UnilightAt, the company it’s note for its fantastic navigation light kits for every type of model aircraft and elicopter, both scale, sport and civilian. These are connectors with double gold contacts that allow a secure coupling even in the event of vibrations. They are a little complicated to assemble but very efficient. They are available in different configurations with contacts for primary channels (servos) and secondary channels (such as lights, brakes, etc.) both in combination with each other and individually. No hanging cables!
 

Anhänge

  • Vano servo.jpg
    Vano servo.jpg
    56,7 KB · Aufrufe: 56
  • Vano servo quota.jpg
    Vano servo quota.jpg
    30,1 KB · Aufrufe: 59
  • AGF chiavetta Usb.jpg
    AGF chiavetta Usb.jpg
    62 KB · Aufrufe: 54
  • AGF programming app.jpg
    AGF programming app.jpg
    174,2 KB · Aufrufe: 64
  • Connettore ali.jpg
    Connettore ali.jpg
    144,2 KB · Aufrufe: 66
  • Connettori ali2.png
    Connettori ali2.png
    289,6 KB · Aufrufe: 71
  • Connettore quota.jpg
    Connettore quota.jpg
    163,4 KB · Aufrufe: 67
Hello, work in progress...
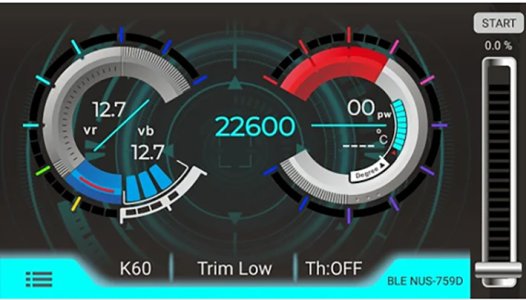
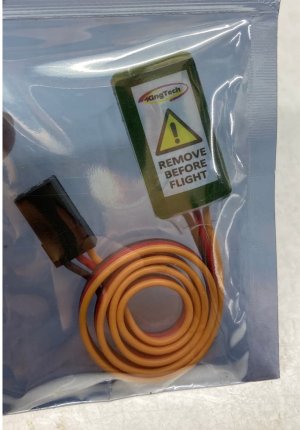
Let's go back a moment to the engine: the Kingtech K130G4+ turbine. Among the most interesting aspects such as the possibility of connecting the ECU to an optional Kingtech telemetry device which allows you to have essential information on the status, operation and fuel consumption of the turbine even during flight on the radio control, there is 'is another one that allows you to do without the engine Gsu display on the ground. This is "Kingtech Gsu Bluetooth module BDT” device which, coupled with the dedicated Android or IoS application downloadable on Google Play or Apple Store, allows you to have the Gsu functions on your smartphone without any cables around. Interesting. The BDT module contains the warning to “disconnect before flight” but I have not found any evidence that this could cause problems. The maximum reception distance of the BDT signal is 6 meters... The same Kingtech application can be used on the smartphone even without the BDT module o but by connecting the mobile phone to the ECU via a USB cable with micro USB connector on the ECU side and normal USB socket but with an Otg adapter that connects to the smartphone's charging socket.
 

Anhänge

  • BDT-APP.jpg
    BDT-APP.jpg
    108,5 KB · Aufrufe: 49
  • BDT-APP1.jpg
    BDT-APP1.jpg
    114,2 KB · Aufrufe: 49
  • BDT-APP2.jpg
    BDT-APP2.jpg
    163,3 KB · Aufrufe: 49
  • BDT-APP3.jpg
    BDT-APP3.jpg
    211,8 KB · Aufrufe: 54
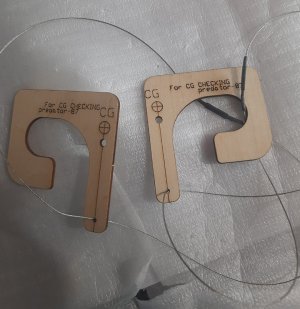
The assembly work is now practically completed and in the weight test the jet scored 11.5kg dry with 200 grams of lead at the tip despite having placed all the batteries as far forward as possible (the Li-Ion batteries are a little lighter than Lipo). For the static balancing test I used the tool included in the kit which consists of two plywood shapes with a hole for the bayonet which are used to keep the model suspended via two steel cables to check the center of gravity. Very useful and practical.
As always happens with a new model, it is important to check all the excursions (I stuck to those indicated in the PilotRc manual) and the correct functionality of the servo controls which takes a little time, but the Pioneer Powerbox control unit simplifies a lot in when all interventions and adjustments are carried out on the Tx. I must say that the AgfRc brushless servos are precise and silent in operation, I trust that they are also good in terms of performance over time. But, as mentioned previously, I have read many positive reviews from those who have used them.
At this point all that remains is the baptism of the air.
However, if you have any questions or need clarifications, do not hesitate to contact me.
In the meantime, I can tell you that the next review will concern a plywood/balsa kit for a turbine trainer without many frills but very easy to drive and set up... Stay tuned!!!
 

Anhänge

  • Accessori centro gravità.jpg
    Accessori centro gravità.jpg
    226,6 KB · Aufrufe: 50
I got a Predator 2.2 too. Same Design. But with a one Piece Fuselage and without any sticker to have that Petronas Design. Installing the thrust Tube is a little tricky due to the one piece fuse. I purchased a vector tube also, but not installed actually because the diameter is smaller so i need to install a new former at the end of the fuse. Mine is almost ready to fly. Servos Savöx 1270, powerbox competition sr2, Evojet 140N Turbine.
 

tomtom

User
1 müsste nen Übersetzer bemühen oder über 1000 (aktueller Lesezugriff hier) ???
In einem Amiforum wurde mein deutscher Beitrag sofort gelöscht und der User gesperrt !!!
 
1 müsste nen Übersetzer bemühen oder über 1000 (aktueller Lesezugriff hier) ???
In einem Amiforum wurde mein deutscher Beitrag sofort gelöscht und der User gesperrt !!!
Mir war nicht klar, dass zum Jahreswechsel Toleranz abgeschafft wurde. Tut mir leid. Ich werde also künftig den Goggle Übersetzer bemühen.
 

Imi

User
Hi Sandro,

Thank you very much for sharing your experience with the build of the Predator.
Much appreciated 🙂.

Looking forward to seeing more pictures and lines about the progress.

Cheers,
Imi
 

Imi

User
TomTom wo ist dein Problem?

Wenn du den Beitrag nicht lesen möchtest ignoriere ihn einfach.
Ich bin dankbar das User (egal in welcher Sprache) Ihre Erfahrungen teilen, ist das nicht Sinn und Zweck eines Forums?

Kommentare von Personen wie dir vergraulen leider die User, die sinnvolle Beiträge in Foren stellen wollen die nicht der deutschen Sprache mächtig sind bzw. sich nicht sicher in der Sprache fühlen.

Der Austausch unseres Hobby sollte nicht durch Sprachhürden, etc.. limitiert werden.

Verstehe nicht wie man so eine Einstellung haben kann.

Grüße
Imi
 
Ansicht hell / dunkel umschalten
Oben Unten